


The Potty Plotters grow your own blog; April to May
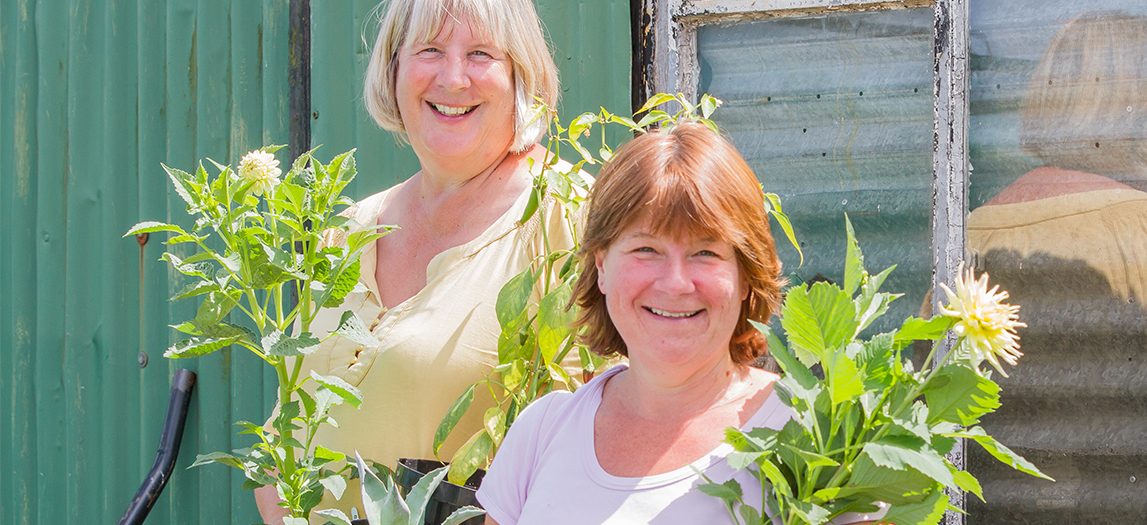
Grow your own has become a firm favourite following the enforced lockdowns of recent years. It’s something that many National Garden Scheme garden owners champion and an area of growing interest to garden visitors looking for inspiration and advice. With kitchen gardens, community gardens and allotments now firm favourites in the National Garden Scheme portfolio we’ve invited The Potty Plotters, Elaine and Julia (our Impact Report cover girls from Ashbourne Road and District Allotments in Derbyshire pictured above) to share their seasonal tips each month for getting the best out of your grow your own plot.
Leeks
The leeks set a few weeks ago should be now growing steadily in their ‘milk bottle beds’. They are slow growers outside but are fine in cold weather so keep them outside now to get used to the cooler air. They will soon appreciate the warmer longer days and as they grow we will show you next month how to transplant them into the garden and their ‘beds for life!’
Potatoes
Planted perfectly, home grown potatoes can be the joy and centre piece of any meal. Gently simmered with a sprig of mint there’s no taste like it which is why we grow them! Of course, we know that you can buy them cheaper at the supermarket but this is about flavour – something that so many people have never experienced.
Last month we talked about planting seed potatoes in tubs. And now? The green tops should be clambering out of the compost and don’t forget that if the tubs are not outside, water them every time it rains and when the forecast is frost, put them somewhere sheltered.
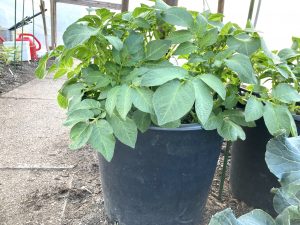
As the weather does warm up, move the tubs outside for the plants to enjoy their outside life and for the potatoes to form and develop. Flowers will start to show and, depending on what kind of potatoes you have planted will depend on what colour the flowers are!
Meanwhile, what about planting for perfect potatoes outside in the garden soil?
There are 2 methods we use. For both, dig over the soil where the seed potatoes are going to be planted getting it to a fine a tilth as possible. Smash down all big lumps of soil as the seed potatoes won’t want a fight over the growing space! (Potatoes do need a big space to grow and multiply so allow plenty of room per row per potato.)
Set a line. Get a long piece of string that will reach from one side of the proposed row to the other. Tie one end of the string to a short stick or similar and the other end to the other stick. (We tie a long piece of string to 2 metal knitting needles. They don’t rot and can be pushed easily into the soil and stays put – and reminds us of those endless days of being taught how to knit) but anything that can stay in place for the next few weeks will do.
Why bother? As the potatoes start to grow through the soil and the green tops emerge, it’s important to be able to identify a potato shoot from a weed! It will also help with where to hoe over later in the process knowing where the row was set rather than hap hazard guessing – and getting it wrong!
Now decide: either, make a deep hole of about 8 inches which you will drop the chitted seed potatoes into or, dig a trench of the same depth and lay the potatoes (evenly spaced) along the row and then cover with the soil. If you decide on the hole method:
- Firstly, set your line (one end of the row to the other)
- Make holes about 8 inches apart and 8 inches deep along the set line
- Carefully drop your seed potatoes into the holes along the line
- Back fill each hole with the loose soil
- Keep the line in place until the potato tops show above the soil
Top tip: Although some folk say to set the different types of potatoes (first earlies, second earlies or main crop) at different spacing intervals and depths, we have always planted all of our potatoes this way and always had great successes!
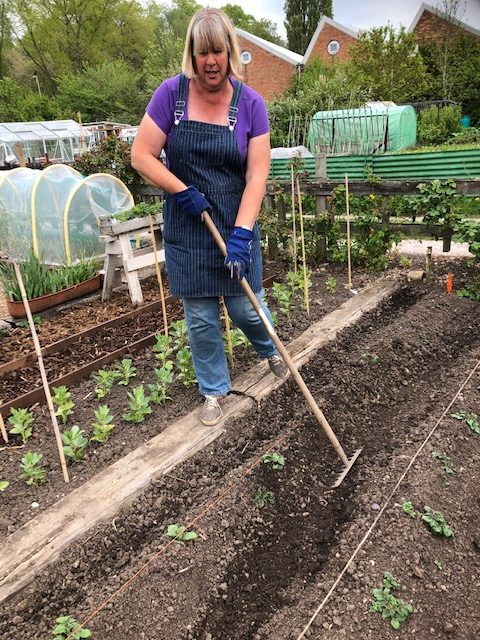
One line down, 3 to go! Before you do the next row of potatoes, think about where you are going to walk in order to be able to dig up your potatoes in a few weeks and to be able to get to them to weed and hoe. It’s advisable to have enough soil in the space adjacent to be able to hoe the loose soil over the new potato tops. This is because the potato shoots are not frost hardy so any cold weather will ‘burn’ the tops off. We recommend leaving at least 3ft before you set the next row. And if you set more rows, just repeat the process. Remember that the potato tops need to be covered with new soil or fleece if a frost or cold weather is forecast which can mean a lot of work depending on how many rows of potatoes you set.
-

- Troughs dug ready to plant potatoes
-
- Newly sprouted potatoes growing through
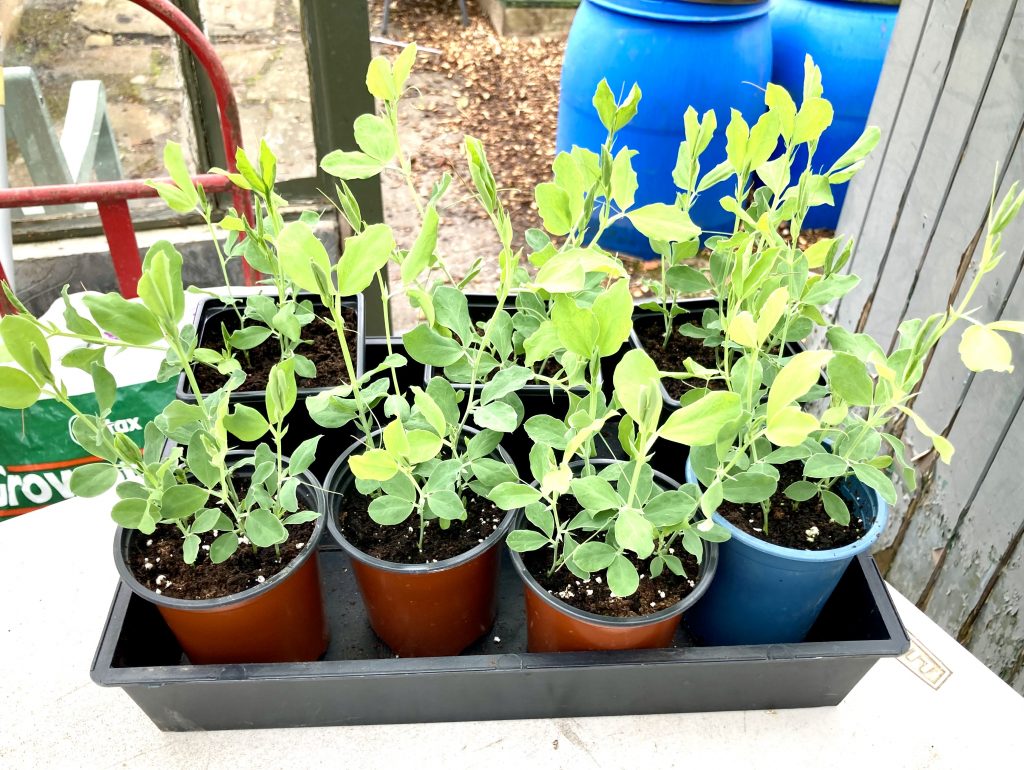
Sweet peas
The sweet pea plants should now be growing steadily in the greenhouse or cold frame. Having snipped at them when they had been having growth spurts, they should be bushing out from their bottoms and be assured, that this will all pay off in the long run! They should be sending out little tendrils (twirly bits that want to hold on to everything as they climb) and be growing upward as they do so.
Most sweet peas are natural climbers. They want to move upwards as they grow and have something to cling onto in doing so. If you have
planted them in a large container, place long, sturdy twigs or bamboo canes in a circle round the perimeter of the container for the plants to attach themselves to as they grow.
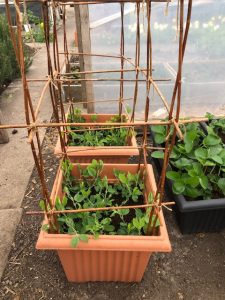 Sweet peas love it in containers! The ideal growing area for them is “with their feet in the shade and their faces in the sun!” (Wish that was a song of some sorts too!) But that is perfect for them. By putting them in large containers, they retain the water and you can dictate where their shading comes from; such as buildings or objects but if you plant them in the garden think about planting around the feet of the plants to shad them. This works particularly well with beetroot or spinach. It will still be short enough for you to pick the sweet peas but short enough to offer the sweet peas shade on its feet ultimately prolonging their lives and growing period. When they dry out there’s no going back, so plan and enjoy the sweet smell of them (as well as your own success of growing them.)
Next time we will describe our advice for added supports for the sweet peas to be able to grapple with as they grow and the best conditions that will help the plants keep blooming with those long, straight stems of scented blooms!
Broad beans
The broad bean plants in the neat rows should now be growing slowly but securely in the soil outside. Farmer McGregor would be proud to see such artistry but let’s make sure that the beans are properly secured as they start to grow because as they do so, the weight of the beans pods on each stalk can pull the plants over and snap the stem so let’s prevent that from happening in the first place.
At the end of each row, hammer in a pole or bamboo stick into the soil. Now, about 3 inches from the floor, tie on end of the string to the stick and take the string to the next stick, to the next and finally to the remaining stick. You should now have a rectangle shape created around the outside of the rows of bean plants.
In a few weeks as the plants start to grow, tie another string line about 5 inches from the first. This will again support the beans if the weather deteriorates.
Whilst the bean plants are not affected by the cold weather, they can be affected by the bean weevil. It is easy to detect the damage completed by them as the weevil neatly chews the outside of the bean leaves leaving little semi circles all the way round the leaves. This won’t harm the bean plant or the pods but is very irritating!
Beetroot
One of the quickest vegetables to germinate is beetroot. Having set the beetroot seeds last month after 10 days there they were! Through the compost and proud as punch all popping through in the warm spring sunshine in the protection of the greenhouse. In the cool of the frosts and recent Midland snow flurries they have slowed in their growth – but keep them watered and as they grow into small seedlings in the next few weeks, we will let you know how to plant each and every one of them into the ground. No harm will come to them in between times as long as they remain in the light and in the cool.
Think about where you are going to plant your new seedlings though. Beetroot loves the sunshine and a fine sandy soil. Seedlings can’t fight the big boulders of soil so start raking down the soil now and every times it rains as the soil is easier to smash up after it is wet – or if you have had a bad day at the office but preparation is key to success so get smashing!
Parsnips
After 10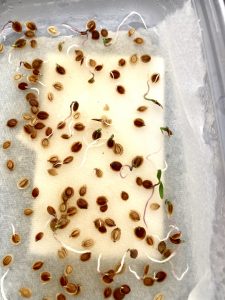 to 14 days the little parsnip seeds germinated (instead of the 8 or 9 weeks suggested on the parsnip packet.) The allotment *‘shuddas’ and ‘cuddas’ are out of a job for another year and instead you are now smug with your germinated parsnip seeds in their snug beds in the takeaway container. Now what?
Each seed should have a white ‘tail’ growing which is now visible. This means that the seed is good to grow and that a parsnip is keen to get growing. Some seeds may even have a green shoot too – but let’s get them settled into their new beds as soon as possible.
Dig over the area that you intend to plant your seeds. Make sure that this patch is not an area that you have recently put manure. Parsnips hate it and show their distaste will fork (split into lots of little roots) instead of one long straight one.
Fork and rake the soil to a fine tilth – and add lots of sand where possible. The seedlings need good drainage and are happy in sand with a small amount of compost or soil. Sounds daft but it works!
Again, set a line as we did earlier for the potatoes. This is really important as the parsnips do take along time to show and when they do are hard to distinguish from weed seeds so make sure the line is up!
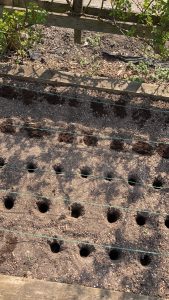 Now it is your choice. Firstly, and much favoured – we like to get a metal bar or pole about 4 ft in length, sink one end of it into the newly dug soil at one end of the line and twizzle it round with all your weight. In doing so you will sink it about 10 inches and 3 inches wide. This is really therapeutic if you have a song in your head to sing to like ‘Going Underground’ by the Jam (both parts relevant) or The Octopus’s Garden by the Beetles? Any song really and now it’s mentioned, bet you will do it!
After you have twizzled your way round the whole area making holes in lines, fill each hole with multipurpose compost to the top. Then carefully pick out a seed from the takeaway container and make an indentation of the length of your first finger joint into the top of each hole and drop the new seed into it. Cover carefully with more compost. When you have seeded all of the holes fix a rose to a watering can and water the area like gentle rain rather than a deluge as the seeds need to stay at the top of their growing hole for the rest of their growing life. The root will grow down into the cavity that has been made and will be long and straight not having to fight with soil boulders along the months to come.
*Generally, man with flat cap insistent on telling you what you should have done or could have done to be more successful with a task
Chillies aubergines and peppers
All of these should now have germinated and be growing slowly in the greenhouse (but protected from the cold nights) or in a cool room at home in the light.
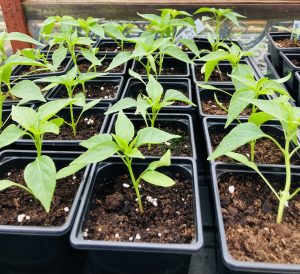 As the seedlings grow over the next few weeks, they will need potting onto bigger containers. Again, carefully loosen the compost around each seedling and lift each one into a new plant pot filled with compost.
Stand the pots in a tray and fill the tray with water allowing each plant to soak up what water it needs from the bottom of the pot. Then removed and stand in the cool light area for it to carry on growing.
Peas
Are these the most popular vegetable that is eaten in the UK? Why not try growing them for yourself?
Firstly, decide where you are going to plant them. What space have you got and accordingly decide what type you are going to try. If you have plenty of room in the garden then you can grow one of the many varieties on the market such as ‘Onward’ or ‘Ambassador’ or why not try a variety specifically selected for container growing such as ‘Half Pint’ which don’t need any supports and will supply you will plenty of peas straight from the pod? If you fancy tall wigwams scattered about your garden spaces then go for one such as Alderman.
What about colours? Why not try a purple pod instead or as well as the green ones, but whatever your choice, follow these easy steps to get started and avoid the seeds being eaten by mice or rats.
Peas grow happily in shared spaces being pushed up against each other rather than having their own individual growing area. But firstly, decide how you are going to germinate the seeds. For container grown peas we set our seeds in old plastic cell trays (as we do for the tall varieties too), but for the standard garden peas we usually set the seeds in plastic gutters with holes drilled along the bottom for drainage.

Simply fill the gutter almost up to the top with multi-purpose compost. Wet the compost and then set the pea seeds on the top as the ‘5’ on a dice face. Push each pea gently (but firmly) into the compost and work from one end of the gutter to the other. In effect you will have 3 rows of peas in the gutter. When the peas are set in place, they will form the basis of a full row which will be easily transplanted into the garden space in a few weeks. Cover the peas with about ½ inch of compost and pat it down with the flat of your hand. This will ‘secure’ the compost and the peas too but peas need to be firmly dealt with as when they start to grow, they do have a tendency to push themselves up to the top of the compost if they are not secured in the first place. If this happens just push them back under the compost so they are covered again.
Keep the gutter watered and in the light. If the gutter is kept in a greenhouse, the peas will show themselves after about 10 days. Leave them to grow to about 3 inches in height and next month we will tell you how to transplant them into the garden or allotment.
Some people will be able to plant pea seeds straight into the ground. For those lucky folk, scrape away a furrow in the weeded, fine tilthed soil of about 6 inches in width and about 2 inches deep. Follow the ‘5’ pattern as described above with the peas and cover the seeds firming them down with the flat of your rake. Water them and wait for them to appear through the soil which, depending on the weather could take 14 to 21 days. These peas will need supporting as they grow so next time, we will show you how this works.
Tomatoes
If the smell of home-grown tomatoes could be bottled and made into a room spray, how many of us would buy it? That perfume just can’t be replicated by tomatoes bought from the shop and every year, without fail, we smell that smell as we pick the fruits still warm from the vine and smile.
The choice of tomato seeds is almost overwhelming, but whatever type you decide you are going to grow; this is the failsafe method of germinating the seeds:
- Fill a seed tray or other container with compost making sure that each has drainage holes or the seeds will drown!
- Firm the compost in the tray with the flat of your hand
- Using a water sprayer or watering can, thoroughly wet the compost
- After the water has stopped draining, carefully pick a tomato seed from the packet and place it individually on the wet compost and carry on until you have covered the area with seeds, giving each room of about an inch. This will mean that as the seeds grow, they won’t get their roots tangled up with each other so will be easier for transplanting
- Cover the seeds with about ¼ inch of compost and place the whole tray or container in a clear plastic bag and tie the end together so that the warmth creates condensation in the bag which keeps the compost damp. Keep them on a warm windowsill or greenhouse bench
- After about 7 to 10 days the seedlings will appear. As soon as this happens, remove the bag and let the air get to the seedlings but make sure that the compost doesn’t dry out.
- Leaves will form as the seedlings grow, so keep turning the tray each day so that the seedlings grow straight rather than bending trying to follow the light!
-
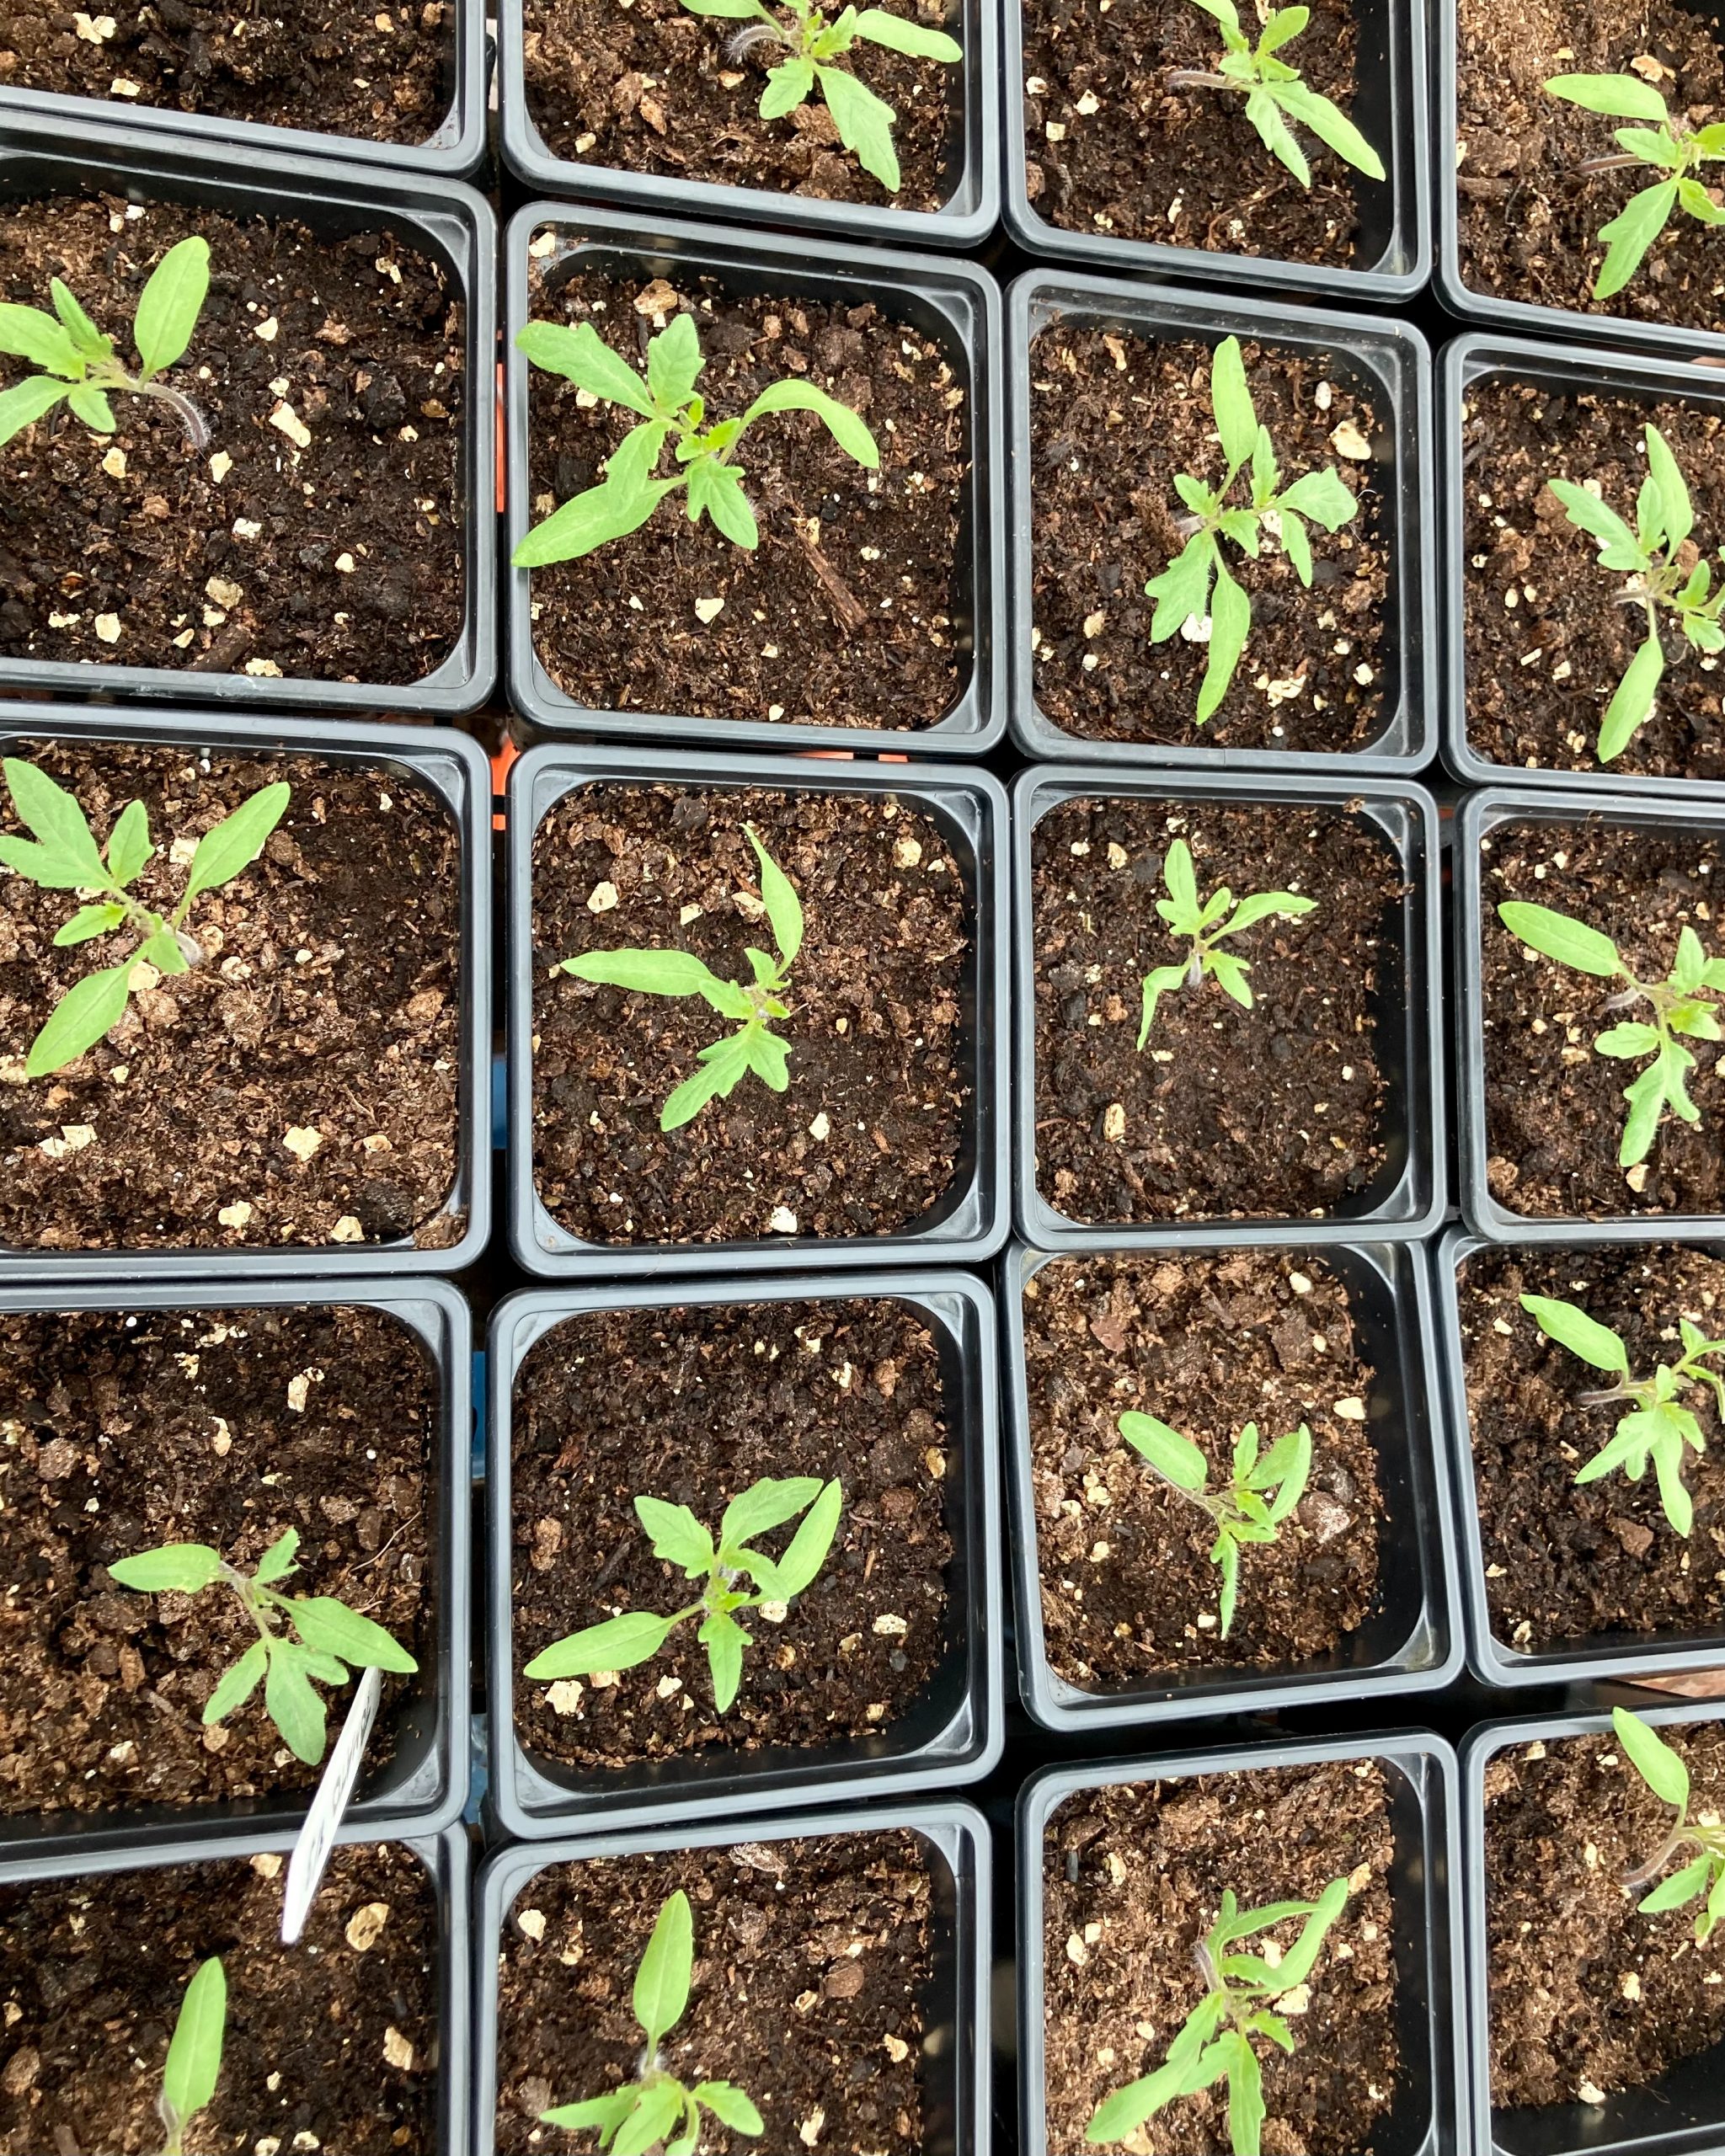
- Pricked out tomato seedlings
-
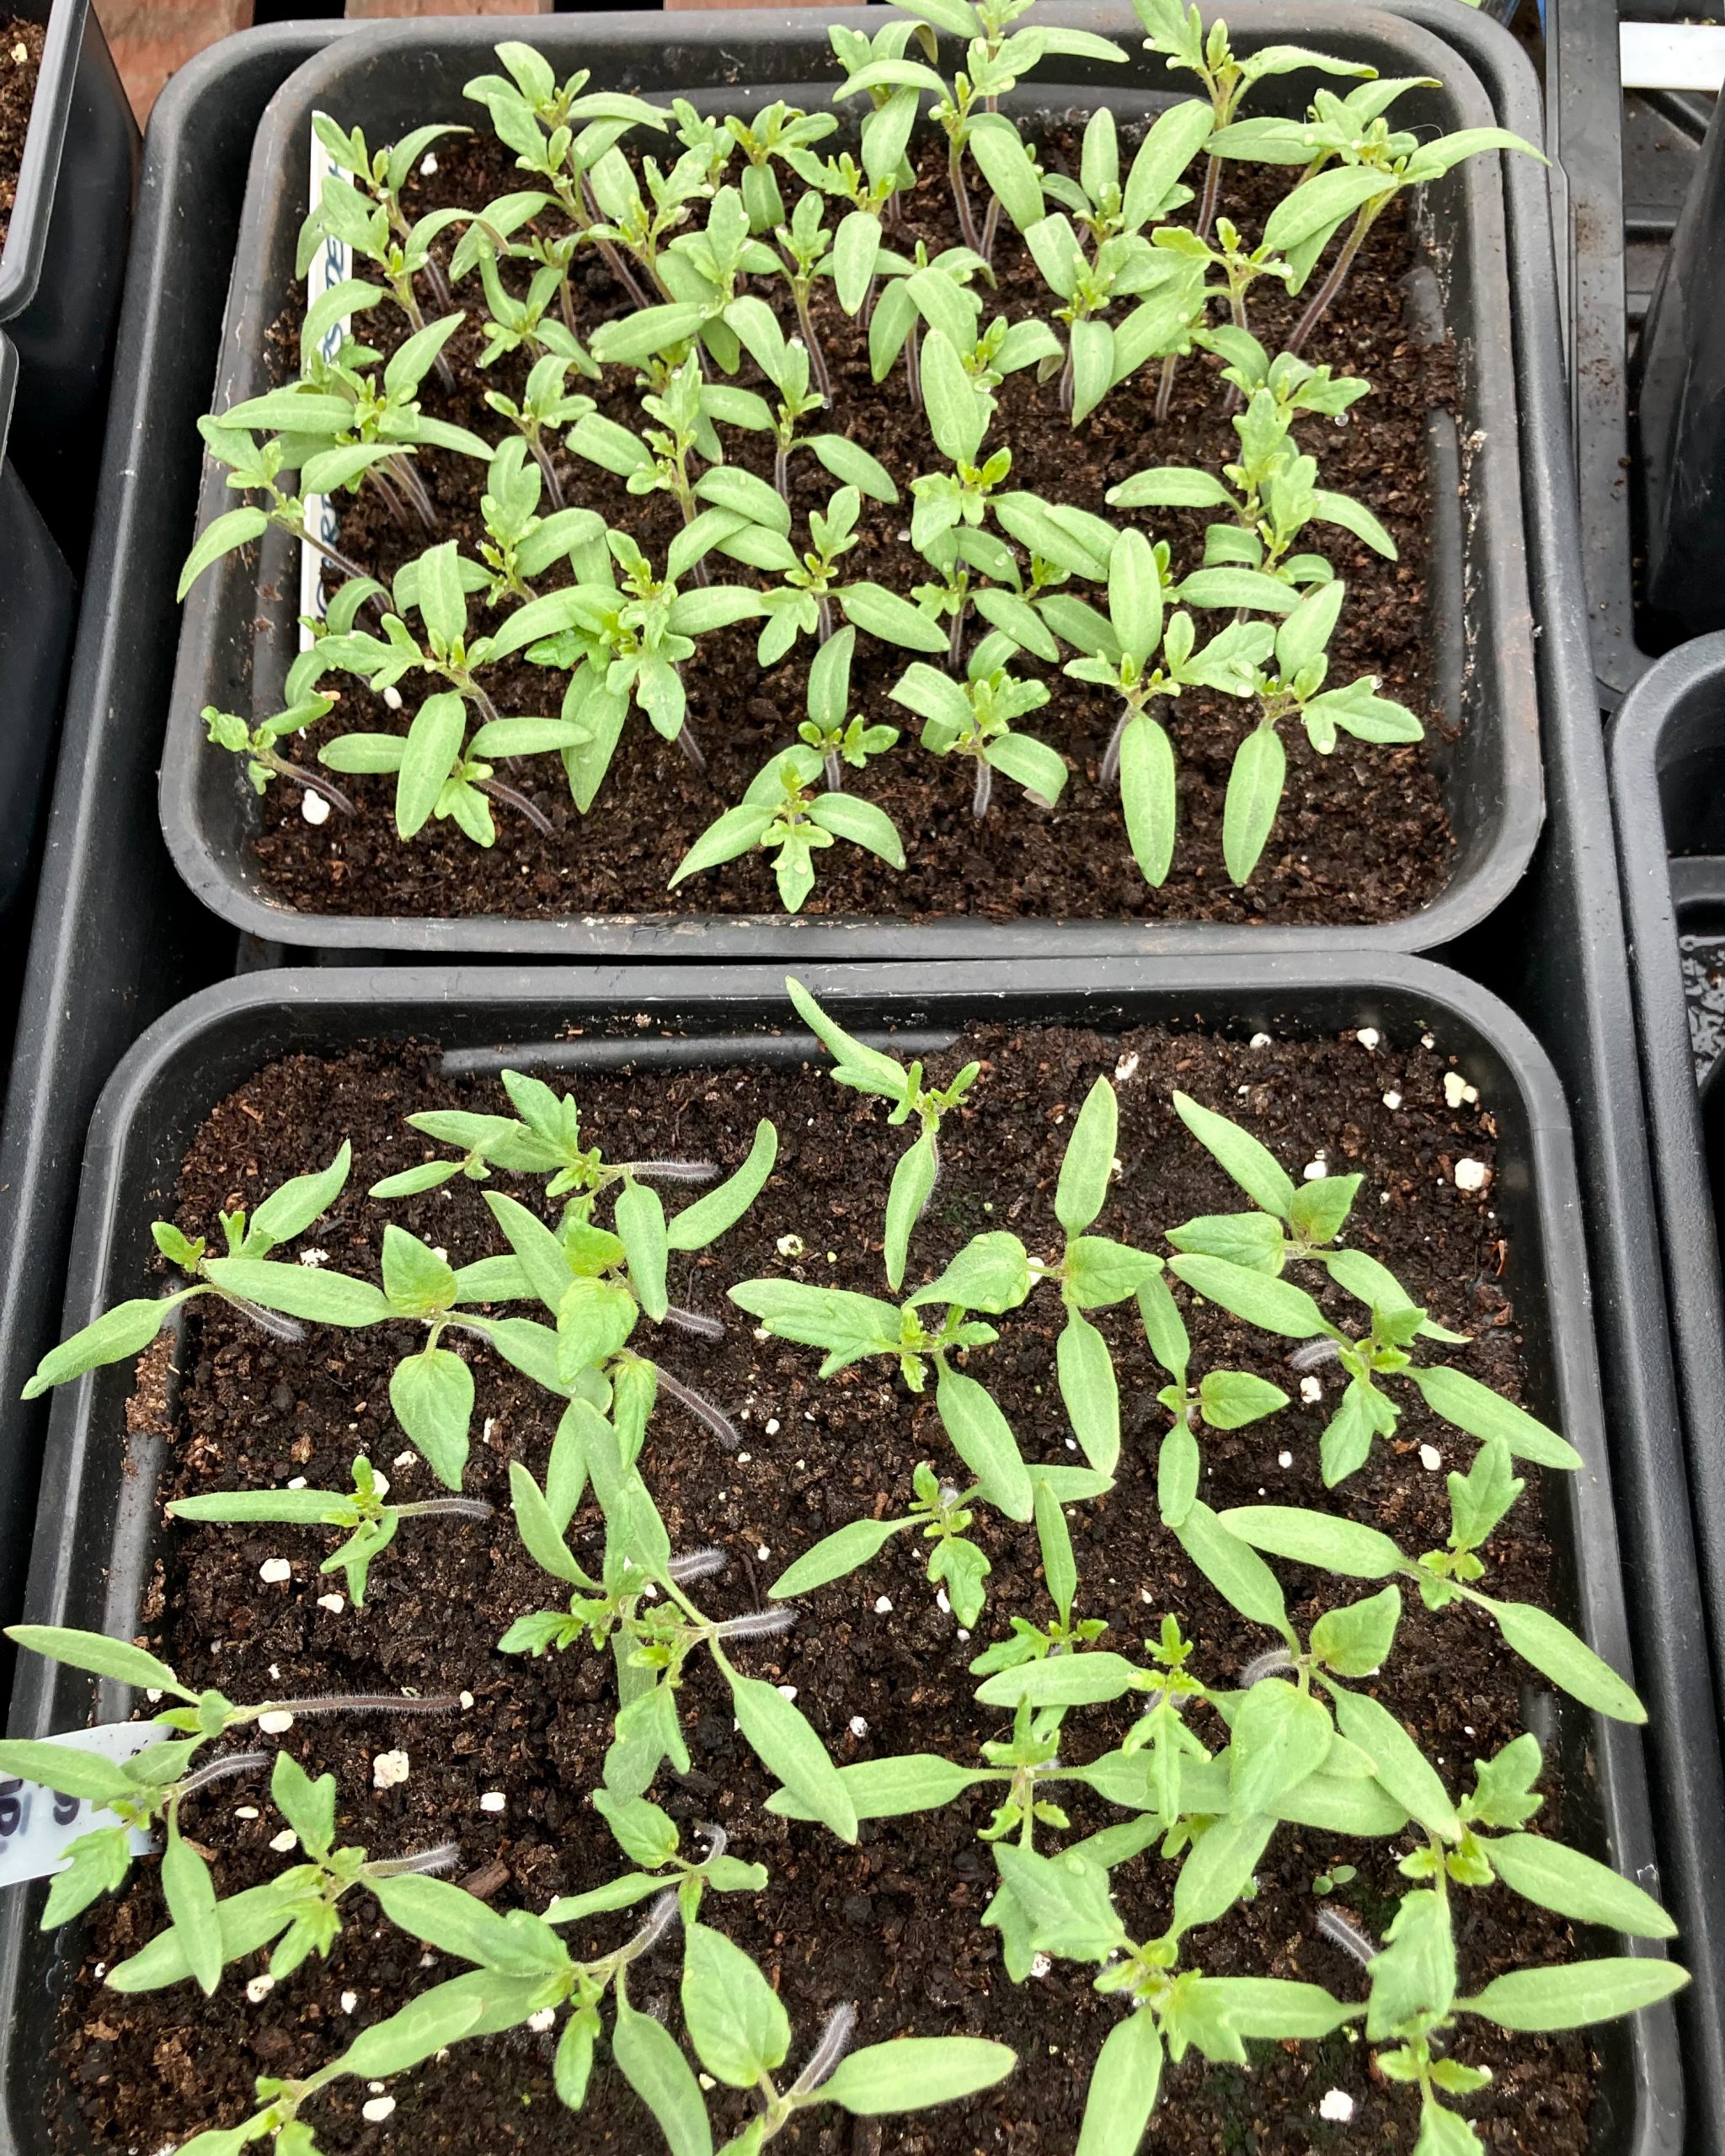
- Tomato seedlings in trays
Top tip: tomato plants don’t like the cold so if you are growing them in a greenhouse, cover them each night with fleece to keep them warm
This is a busy time of year for most growers, but enjoy the experience of growing your own, as every day really is a learning day and don’t forget it’s World Naked Gardening Day on 7th May!
Missed the last blog – find it here.

Planning, preparing and planting now will reap rewards in the months ahead – Photo: Amanda McConnell